UPDATE: 16/Oct/2024. This article is deprecated. Microsoft have focused their attention away from the Kubernetes bridge project. It you are looking for supported alternative checkout mirrord.
Let’s say your code runs on Kubernetes? Cool!
But during development you run your service locally?
Ok, now what if you had something already running in a Kubernetes Cluster, but you wanted to replace it with something running locally so that you could debug or test something in development?
Or, let’s say you wanted your local instance of something to be able to call services inside the Kubernetes cluster so that you could develop without having the full stack running on your machine? That would be pretty cool right?
What I am describing is a neat debugging, testing and development technique which is especially useful in microservices environments. In these environments, it may not even be possible to run an entire stack on your development machine. Some kind of remote server to local proxy is needed. In this article we are going to look at the VS Code “Bridge for Kubernetes” as a solution to this problem.
The VS Code “Bridge for Kubernetes”
The “Bridge for Kubernetes” VS Code plugin is a powerful tool for achieving routing between a local code instance and a Kubernetes Cluster. In this blog, we’re going to set it up from scratch with our existing code or, use the sample application from Microsoft.
The below animation (with thanks to Microsoft), visualises some of the scenarios that can be supported.
Source: Microsoft: Bridge to Kubernetes documentation & tutorials
Setting up and testing the bridge
In order to follow these steps, it is assumed that you have:
- VS Code
codeinstalled - Kubernetes
kubectlinstalled - A remote Kubernetes cluster with permission to connect to it
Installation and launch configuration
Step 1: From the “Extensions” part of VS Code, you can search for the “Bridge to Kubernetes” plugin from “Microsoft”. Install the plugin.
Step 2: Open a code repository that has an existing launch configuration at .vscode/launch.json. If you don’t have an existing one create a new one. Or, if you want to just try it out with a sample application, you can run the following to clone Microsoft’s example and open it in VS Code:
git clone https://github.com/Microsoft/mindaro
code mindaro/samples/todo-app/stats-api
If you’re using the stats-api example, you’ll also requires a redis cluster so let’s run that from a separate terminal:
docker run -p 6379:6379 redis
Step 3: Now go to “Run and Debug” and make sure that in the dropdown it has your launcher config. This is to make sure that the launch.json is correct. If desired, run the stats-api just to test it’s working. At this point, it isn’t doing any of the kubernetes proxying.
You can call it from curl -v http://localhost:3001/hello and you’ll get a response that says hello!.
The remote Kubernetes cluster
Step 1: The remote Kubernetes cluster should be set as the default context. You can check your default context with kubectl config current-context. If you are happy with the context, let’s create a namespace for our application and set it as the default namespace.
kubectl create namespace todo-app
kubectl config set-context --current --namespace=todo-app
Step 2 Now that we’ve got a namespace, let’s deploy the application to our cluster.
kubectl apply -n todo-app -f mindaro/samples/todo-app/deployment.yaml
If you want to check that the application is working, go to the EXTERNAL-IP that is listed from the frontend service.
kubectl get svc frontend
In a real application, you would usually have a DNS record and ingress to the frontend but in our case, accessing the application via the IP address is enough to see that is is functional. We should also query the pods to make sure that all of our pods are healthy.
Running kubectl get pods command should yield something like:
NAME                            READY   STATUS    RESTARTS   AGE
database-api-69b87c7bd8-m57fj   1/1     Running   0          5h26m
frontend-5865c6f8df-fjmtn       1/1     Running   0          5h26m
stats-api-589b6b8444-tvnjt      1/1     Running   0          5h26m
stats-cache-55494d9d48-hb4q4    1/1     Running   0          5h26m
stats-queue-5c9d6c5597-j4wt7    1/1     Running   0          5h26m
stats-worker-b745b6cd9-6v8n4    1/1     Running   0          5h26m
todos-db-698dc6d64-brndz        1/1     Running   0          5h26m
Creating a new configuration that uses the Bridge to Kubernetes
Now that we are ready to go with our remote and local setup, let’s create our launch configuration. There is two ways to do this, via the GUI or via an edit to the launch.json.
Option 1: Creating the launch configuration via the GUI
Step 1 Open the launcher (Cmd+P on Mac). Then start typing Bridge to Kubernetes: Configure and select it from the list.
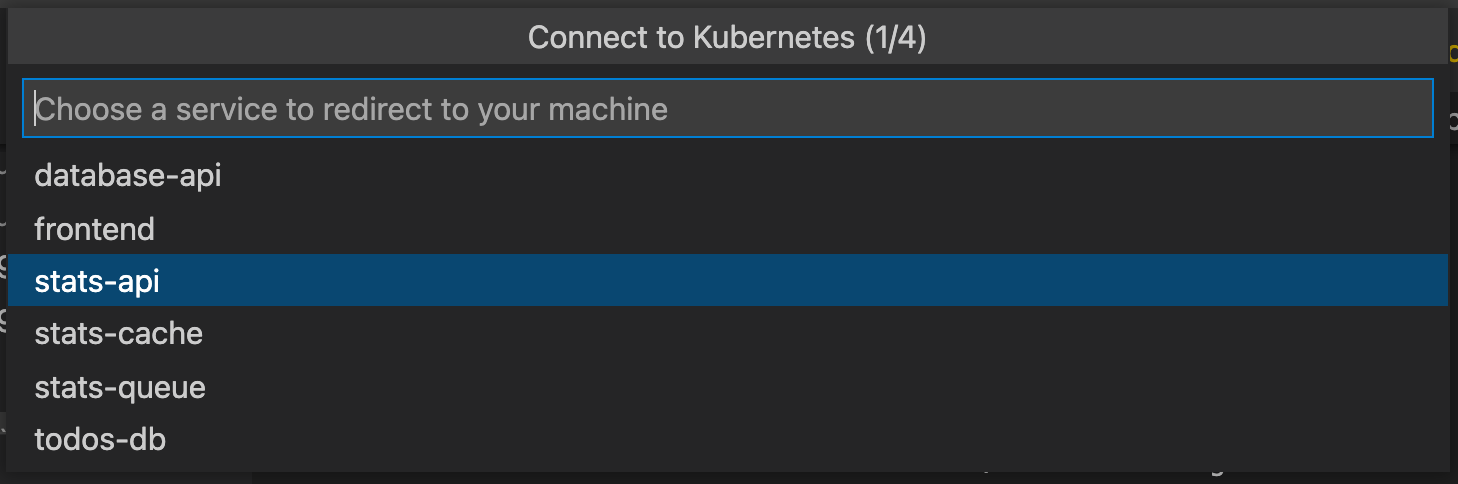
Step 2 Next, we will be prompted to select our service (assuming our local Kubernetes configuration was set up correctly in the previous set of steps).
Step 3 Once we’ve selected our service, we need to specific the local port that it is running on. If we want to follow the example, choose the stats-api and enter 3001.
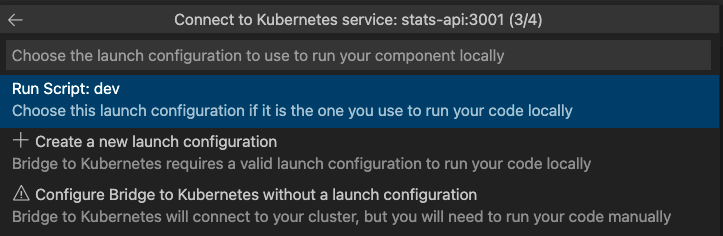
Step 4 Select the existing configuration from the list. If you are following the example, it is called Run Script: dev.
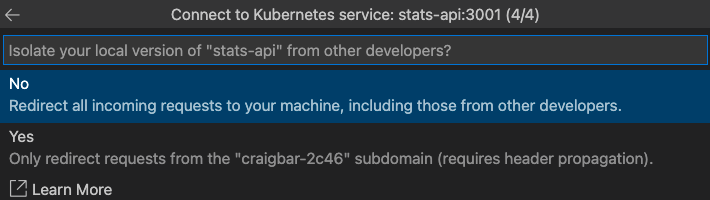
Step 4 Finally, we need to choose if we want to send all requests for our service or just isolate the requests from us. If using the example, the service that will either recieve all requests or just our requests is obviously stats-api
Submit your choice and then that’s it. You should see the updated configuration at .vscode/launch.json and .vscode/tasks.json.
Option 2: Editing the launch.json file directly
This option is more for advanced users. If you are setting up the configuration for the first time, it’s probably a good idea to use the previous option and just inspect the created files in .vscode. If this is you, please go ahead and skip this section. You can always manually edit the files later if you want to.
All of that said, if you want to create the files from scratch, please continue.
Open the launch.json and find the launcher that you want to include the bridge support. Let’s say we want to add it to this
{
    "type": "node-terminal",
    "name": "Run Script: dev",
    "request": "launch",
    "command": "npm run dev",
    "cwd": "${workspaceFolder}"
}
Copy the configuration and paste it as a new item in the configurations: array. Change it’s name. For example, instead of Run Script: dev call it Run Script: dev with Kubernetes. Finally, add the following to the configuration
    "preLaunchTask": "bridge-to-kubernetes.resource",
    "env": {
        "GRPC_DNS_RESOLVER": "native"
    }
Save the launch.json.
Now we’re got the launcher configuration, but how does it know to connect to our cluster. To do this we create a file called tasks.json. Below is an example for stats-api. The targetCluster should be updated to match your context.
{
    "version": "2.0.0",
    "tasks": [
        {
            "label": "bridge-to-kubernetes.resource",
            "type": "bridge-to-kubernetes.resource",
            "resource": "stats-api",
            "resourceType": "service",
            "ports": [
                3001
            ],
            "targetCluster": "gke_my-project_us-central1_my-cluster",
            "targetNamespace": "todo-app",
            "useKubernetesServiceEnvironmentVariables": false
        }
    ]
}
Running our local service with the Bridge to Kubernetes
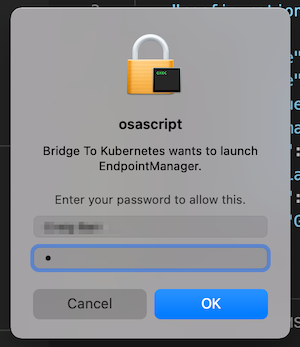
Here is the fun part. Let’s go to “Run and Debug” and start our service using the launch configuration that has the bridge. If we are running this for the first time we will need to give it permission so it can change out /etc/hosts file with the records it needs to work with the remote cluster as if the services are running locally.
Watch the logs as the service comes up. You also might want to watch the pods on the remote cluster. The remote cluster should start terminating the stats-api to replace it with a proxy pod (of the same name). This proxy pod is what sends the requests to our local instance.